Better Audio for Home Video
These days a lot more people are doing some kind of video presentation from home.
In general, when we are talking about stay-at-home recordings or broadcasts, the presenter is you. A smartphone is often the video/audio capture device you will use, since in many cases that phone might be the only device you have available. Using a smartphone to capture video/audio is acceptable, as long as you pay attention to a few details. Some of you will substitute a tablet, laptop, camcorder, or personal computer for the smart phone.
You should note that in many cases, the most important information (or entertainment) is contained in the AUDIO portion of your content. You know this is true because otherwise you could simply show some slides or use captions and say nothing.
Sometimes the important part is not what words you say, but how you say them.
Let’s assume for now, that you have informative or entertaining audio that you want to say or capture as part of your video presentation.
It is really unfortunate that many people try to use the microphone contained within their smartphone, laptop computer, or camcorder for video production. Unless you keep your face very close to the camera lens for the entire presentation, your video device microphone is NEVER in the right position to record your voice. The built-in microphone in your device will be too far away for acceptable sound quality.
It is very typical for the camera to be roughly 3-10 feet from the presenter. This is why “selfie-sticks” extend your arm reach to about 4 or 5 feet. But please, don’t try to do an entire presentation using a selfie-stick.
In many cases, the echoes of your voice from your walls and ceiling will arrive at the microphone with nearly the same energy as the sound traveling directly from your mouth. Some waves will add to each other and some will cancel each other. However, these echoes arrive later than the sound directly from your mouth. We use words like reverb (reverberation) or echo-chamber to convey what is happening.
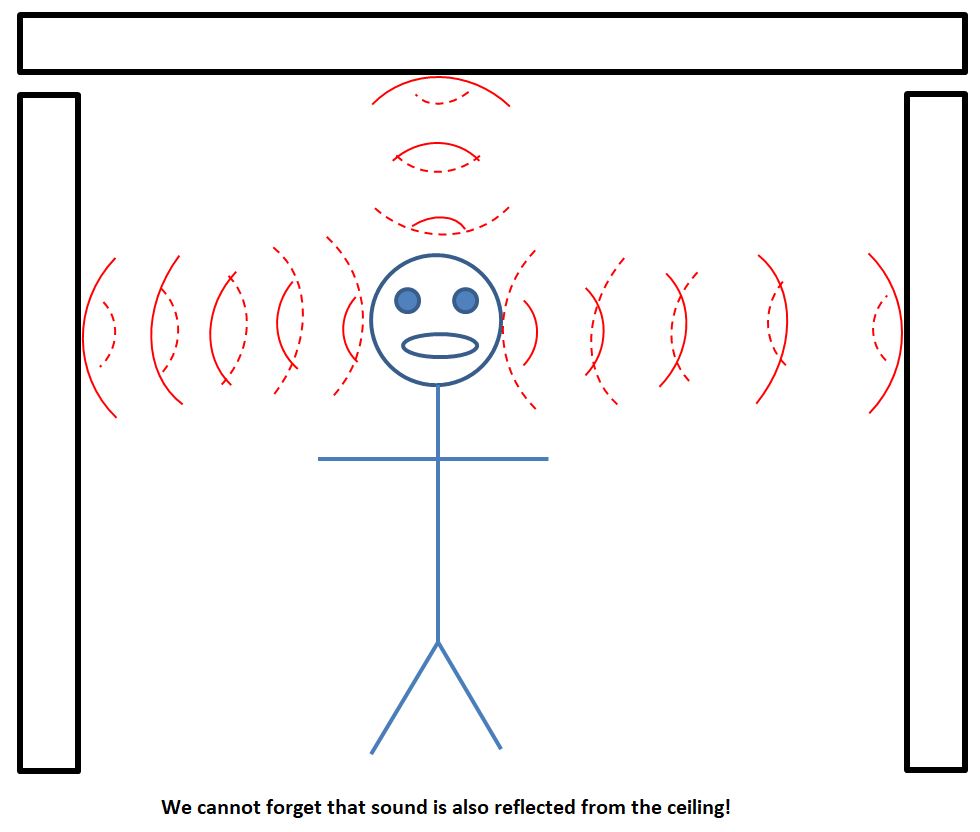
Remember that the sounds leaving your mouth bounce off of the walls, the ceiling, the floor and every object in the room. Those echoes arrive at any position in the room at different times. Hard surfaces tend to reflect sound better than softer surfaces.
But why does the microphone audio sound so much worse than what you hear when you are in the same room at the same distance? First, what you hear has a strong component of bone-conduction through your skull; from mouth-to-ears. This is part of why everyone feels their own voice sounds unnatural on a recording.
There are two additional perceptual effects at work here. We typically have two ears providing giant floppy skin and cartilage funnels to route sound into our ear canals. Our brains are quite good at locating the direction of the primary sound source. Those floppy funnels are good at diminishing some of the sound from behind us while increasing sensitivity to sound in front of us. Finally, our brains are also good at rejecting echoes from random directions when they arrive within about 20 milliseconds of the primary signal.
However, when all of this sound is all captured at a single point in space--where the smartphone or video recording device sits--then what we hear in the recording sounds very different from what we might have perceived with our own ears. We really want to reduce the sensitivity of the microphone to those echoes as much as possible.
Now you could attempt to modify the room where you record to be much more dead-to-sound-reflection. This can take a huge amount of time, materials, and effort. Your family might not appreciate your desire to glue squares of convoluted foam to every hard surface. They might even threaten you with violence if you try.
How can we fix this problem?
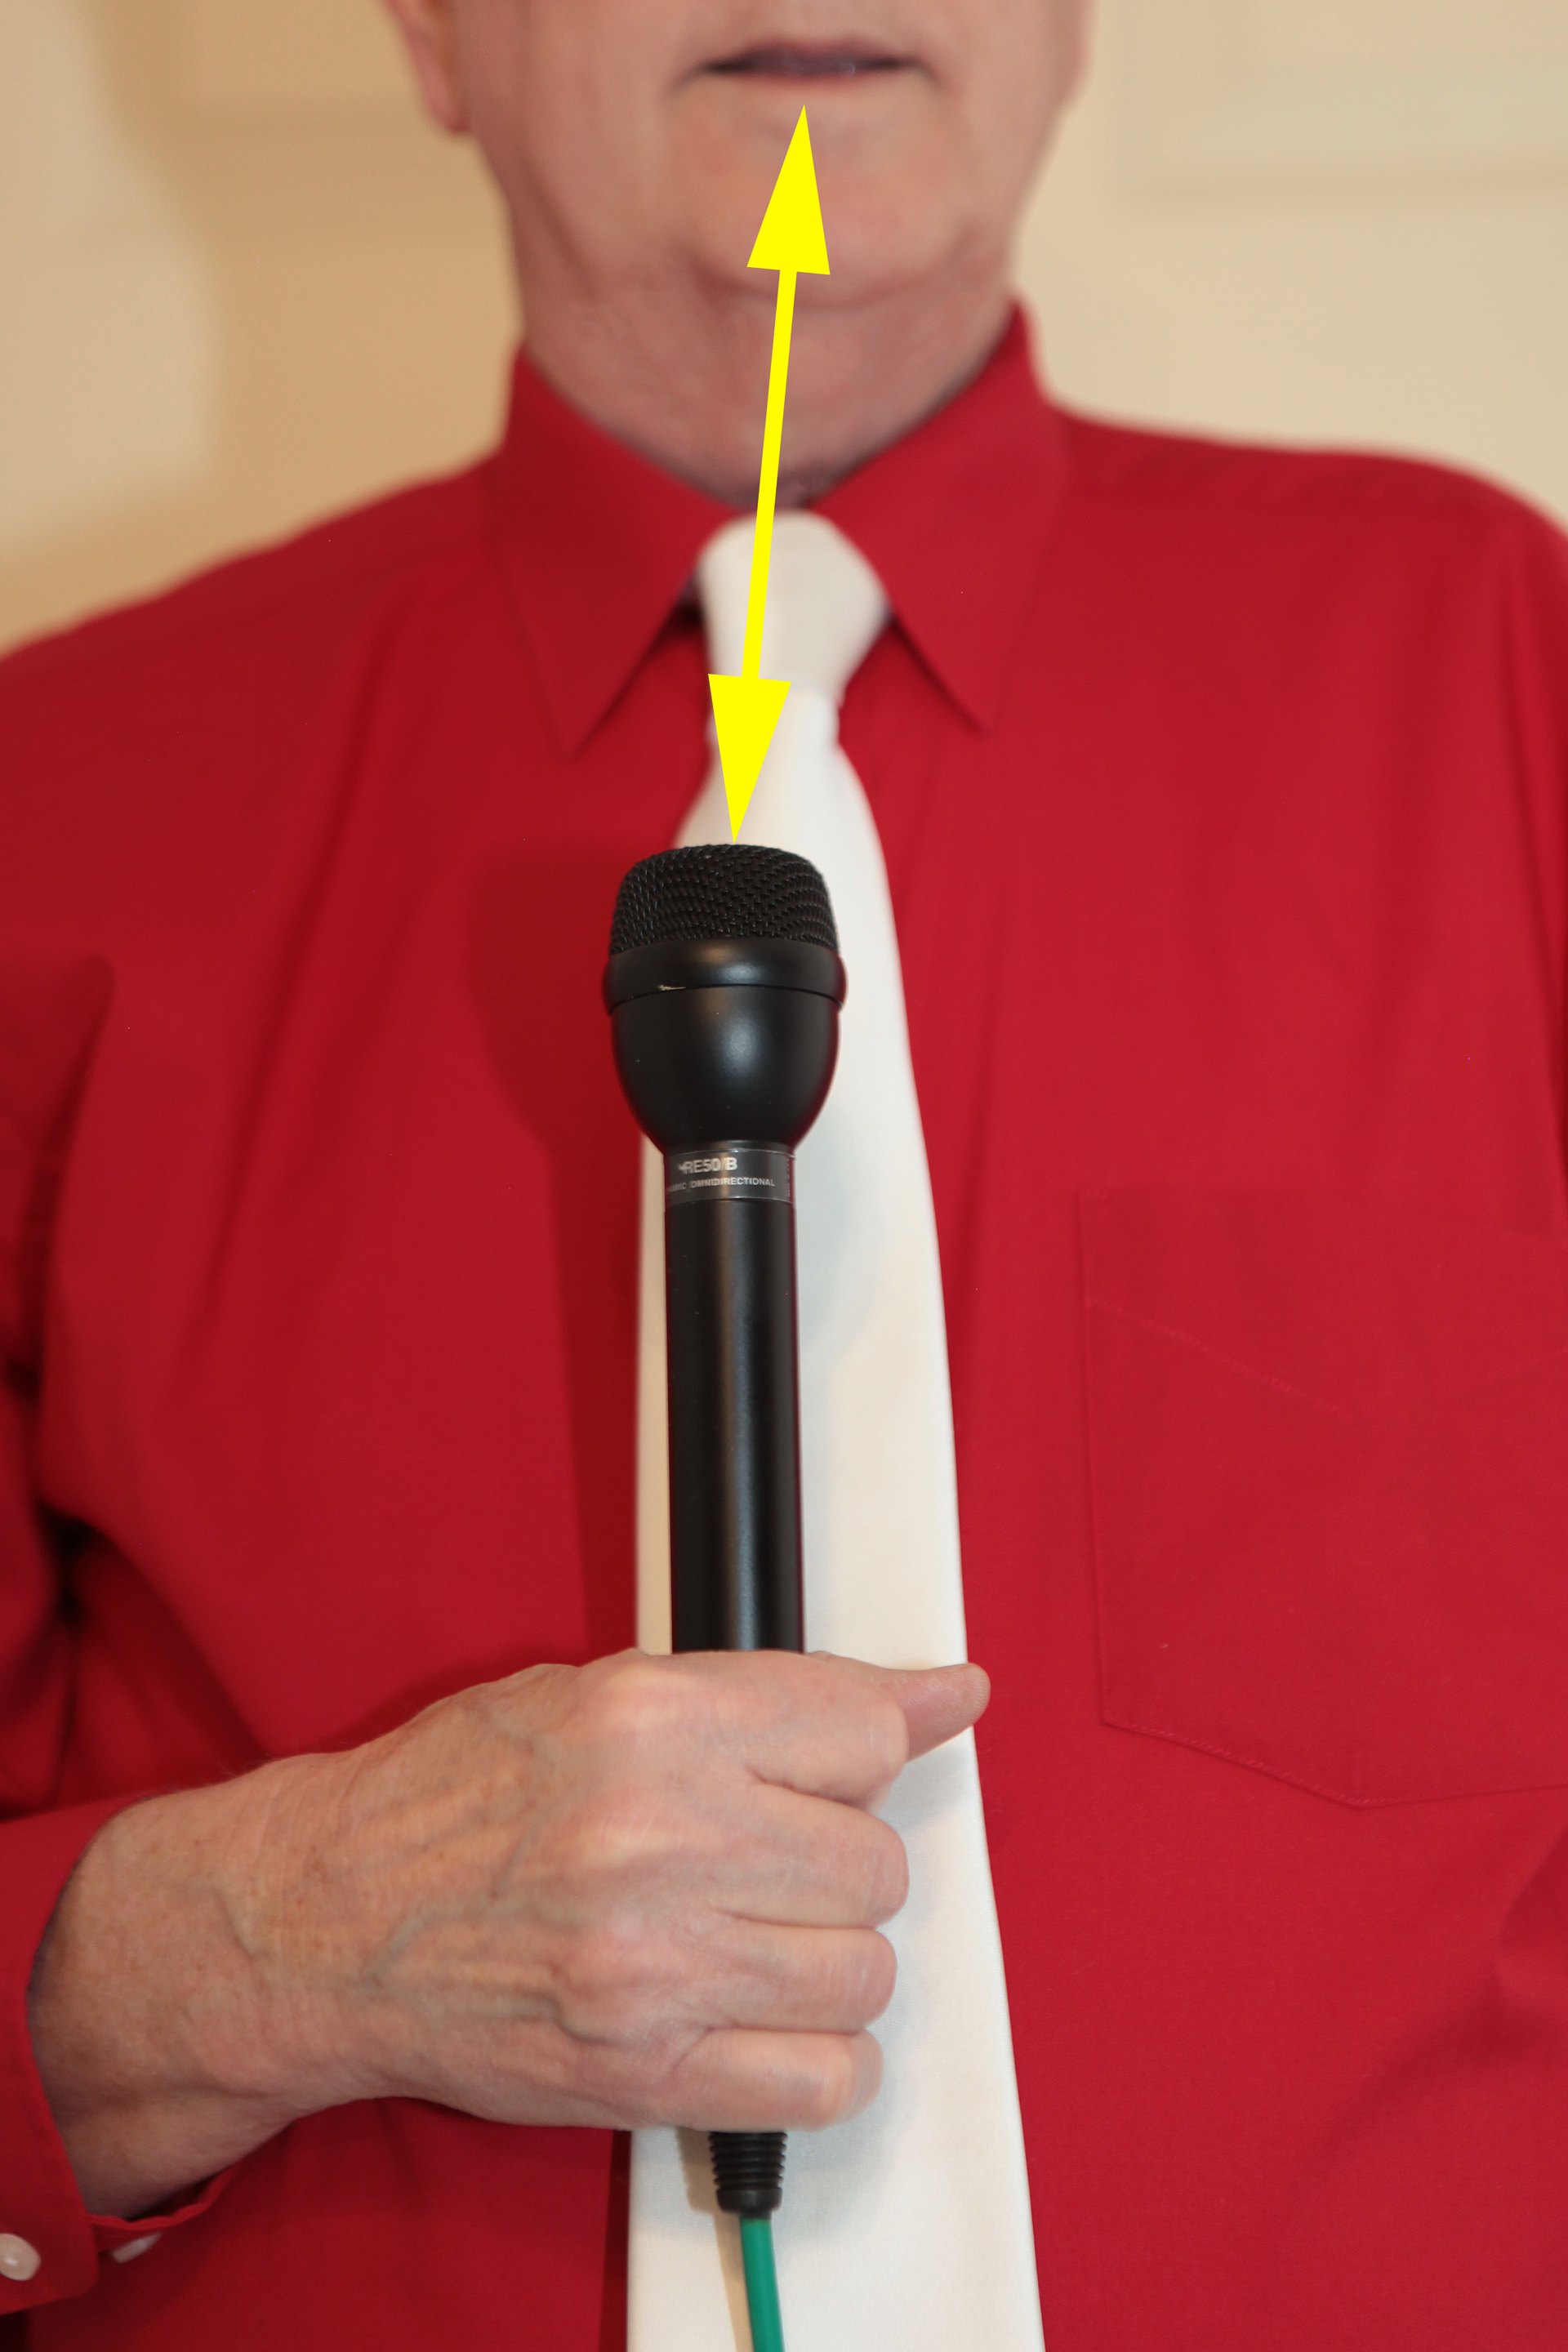
Rule 1: Get Closer to the Microphone
The closer your mouth is to the microphone, the louder your voice will be as compared to any echoes from the room. Your mouth should be about 6-12 inches (14-30cm) from the microphone. With the right microphone, that distance could be almost 18 inches (less than ½ meter) but generally closer is better until you hit that 6 inch distance.
- The type of microphone you use might be omnidirectional or might have a specific pattern where it is more sensitive in some directions.
- Omnidirectional microphones allow you to not be so precise about their position, but are also more likely to pick up echoes and stray noises from all directions.
- Directional microphones are better in noisy or reverberant environments, but require you to pay attention to speaking directly into the microphone.
If you put the microphone too close, you will risk distortion from plosive sounds like the letters “P”,”K”, or “T.”
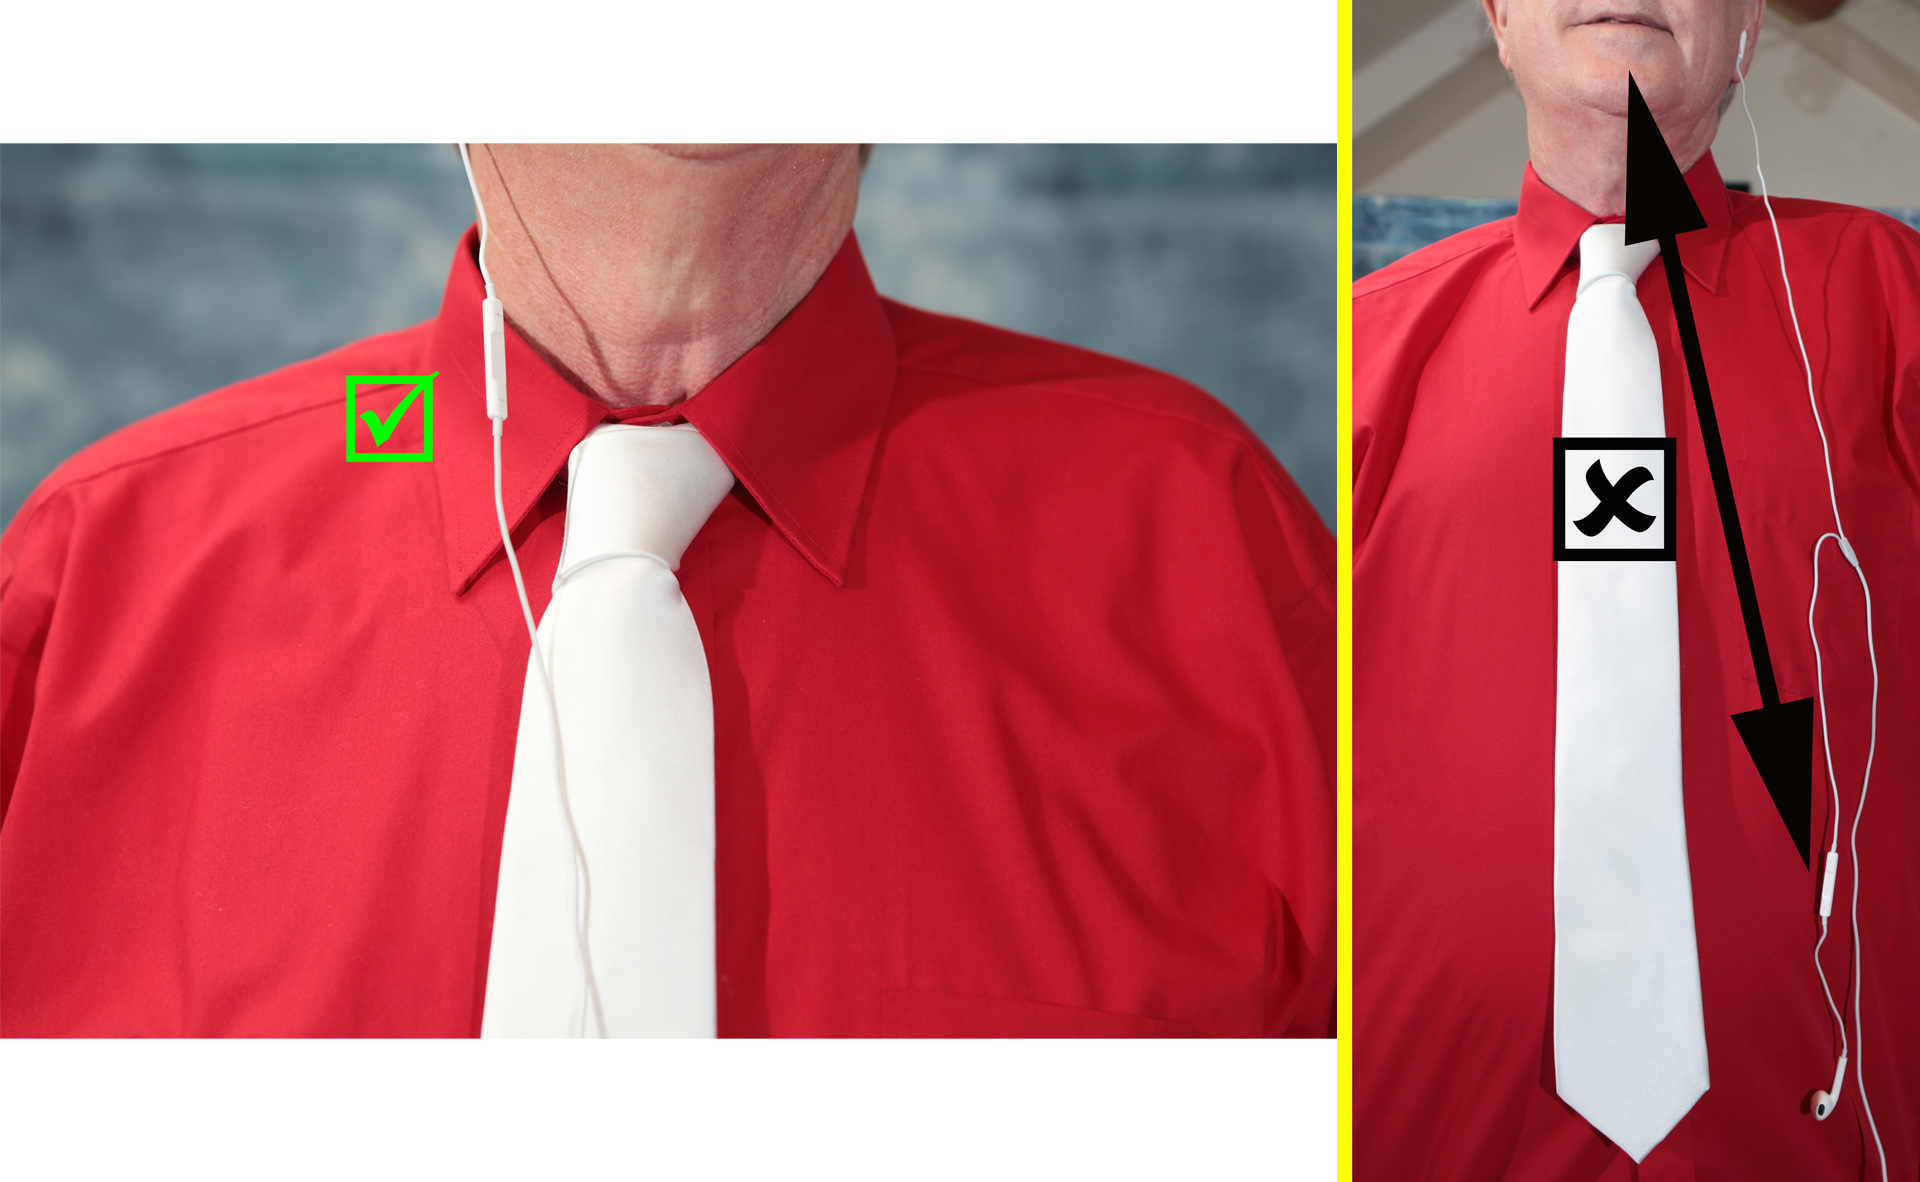
One of the most commonly available external microphones will be part of an external “earbud” headphone-microphone setup.
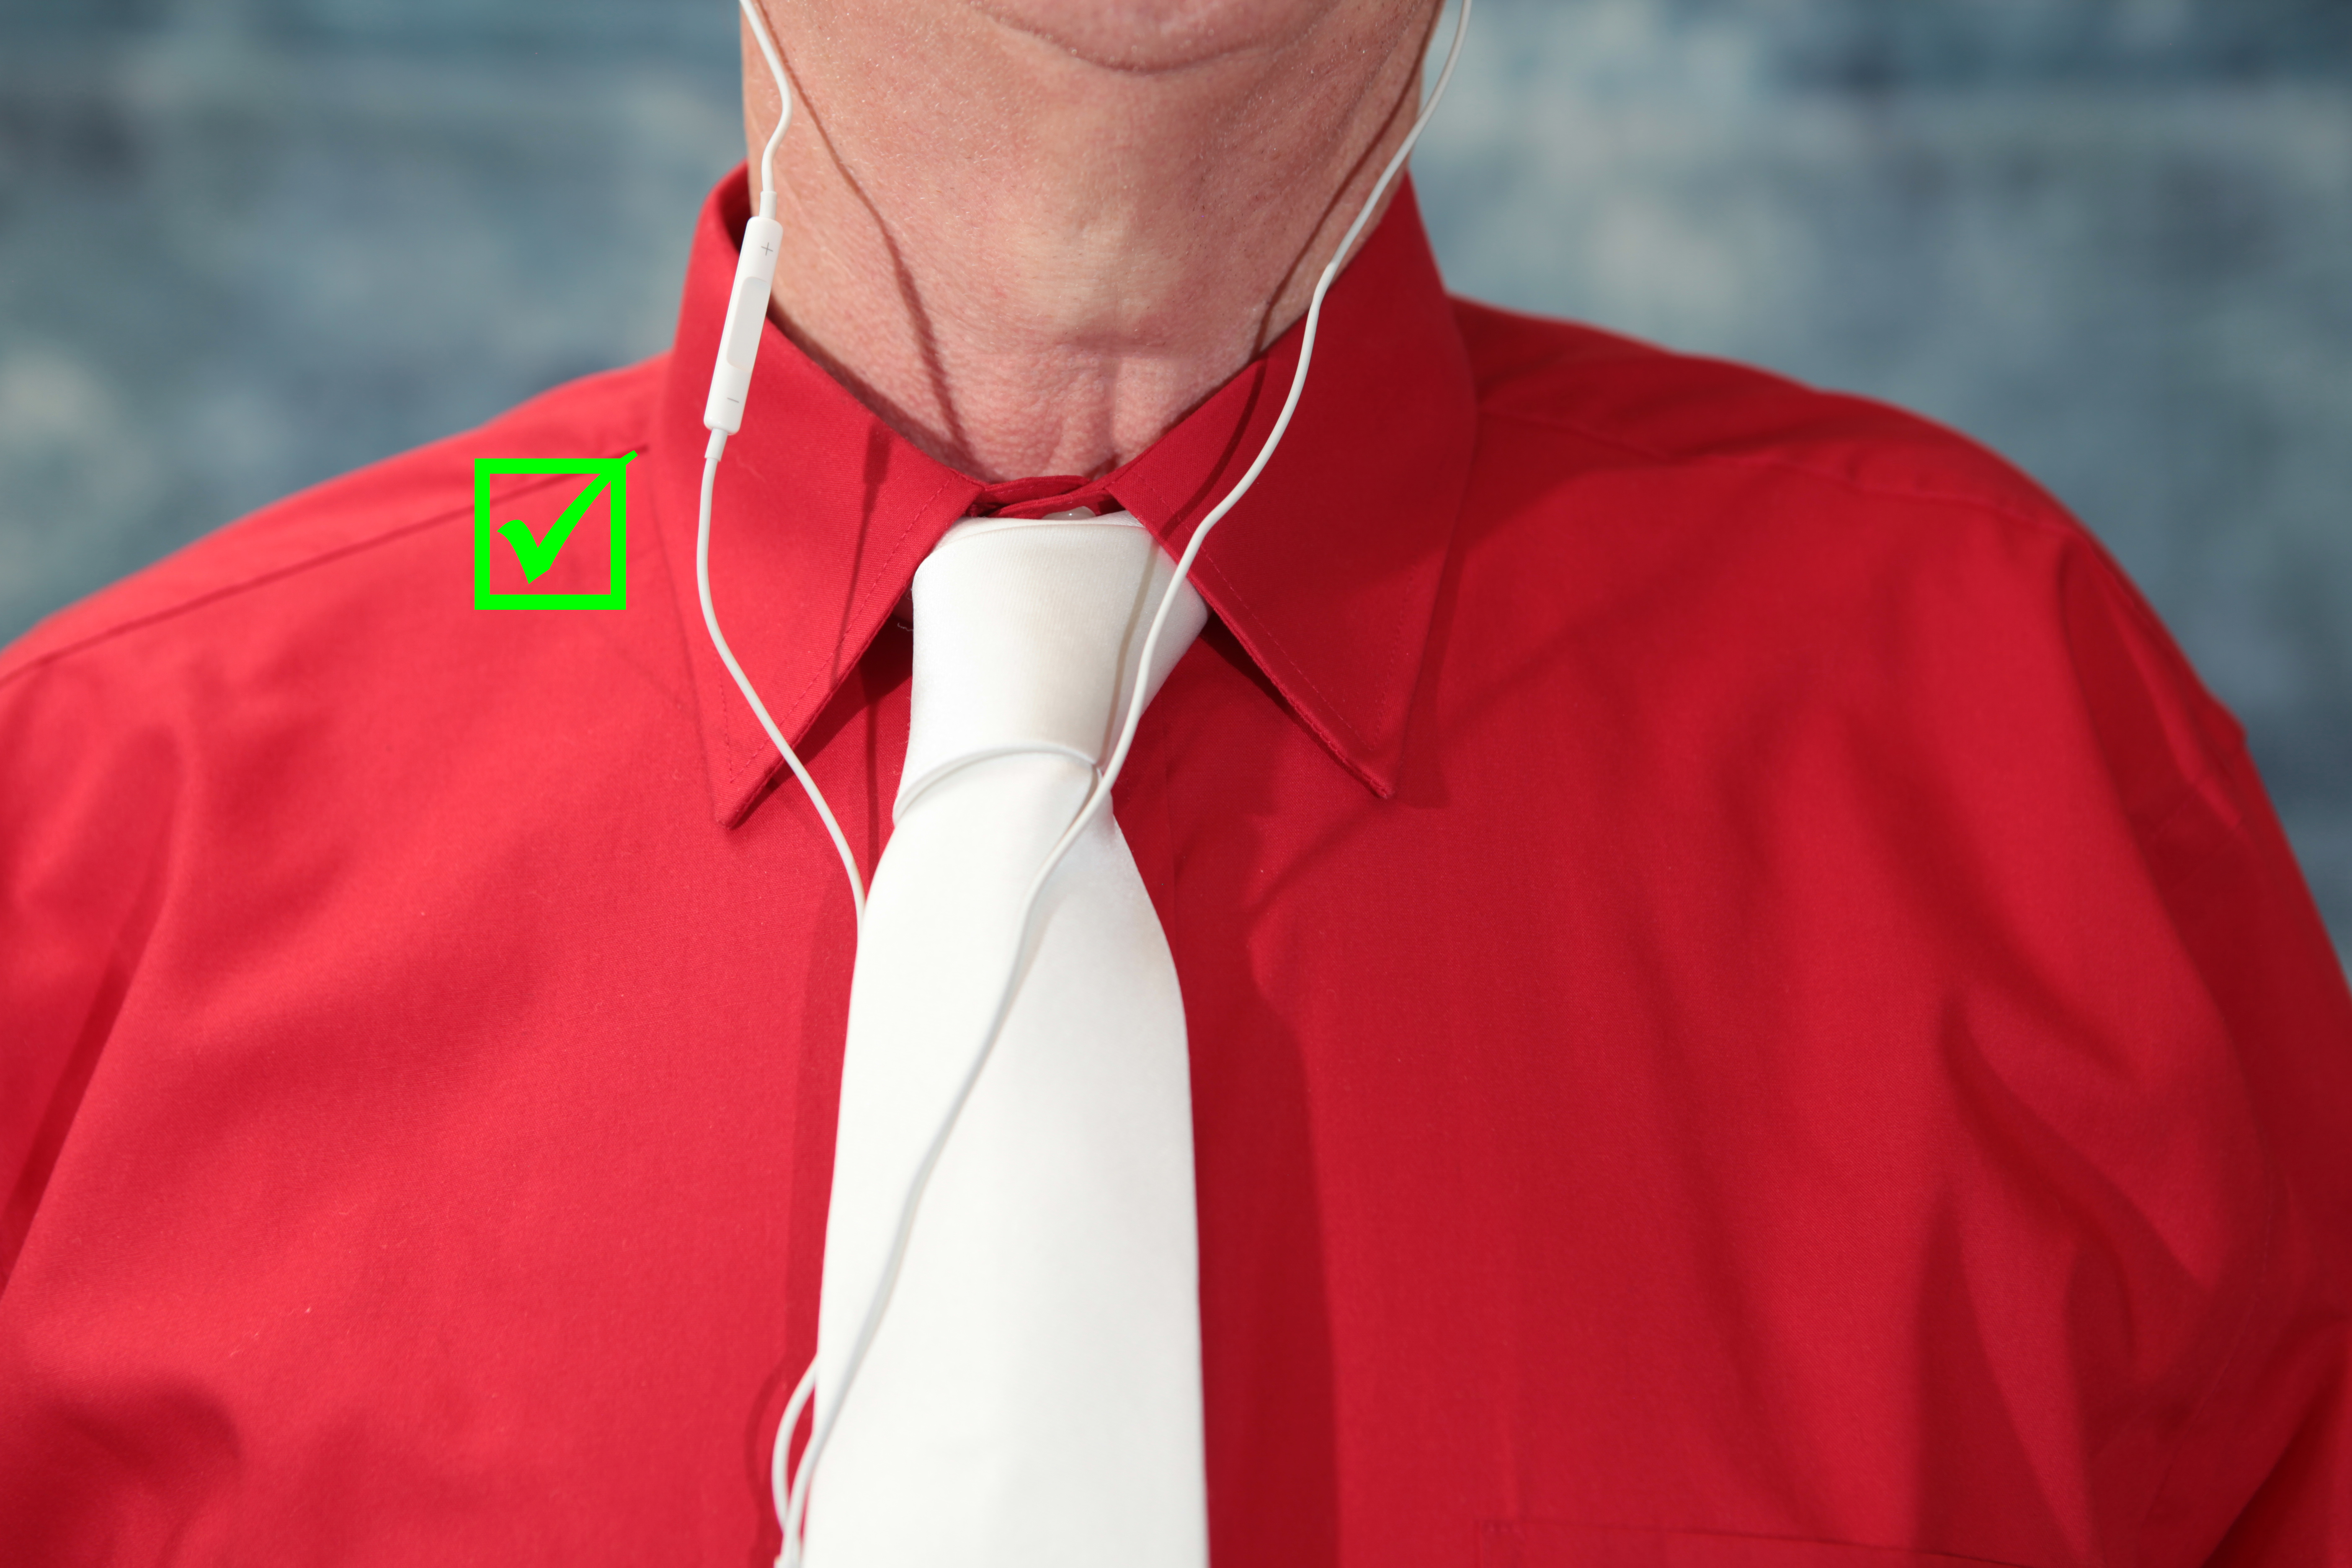
With both earbuds in your ears, the microphone will be located at a reasonable distance from your mouth. You will need an audio extension cable to reach between your headset and the recording device. With any headset arrangement, you need to be careful not move or fidget around too much, because the microphone will pick up the sound of scuffing against your clothing.
I have occasionally seen people use only a single earbud. If you do this, make sure you use the correct earbud to keep the microphone reasonably close to your mouth.
You might run into the problem that Apple has removed the combination headphone/microphone jack from their newer phones. They did this for their convenience, not for yours. Fortunately, they sell a $10 accessory that they cleverly only identify as a Lightning Headphone Adapter.
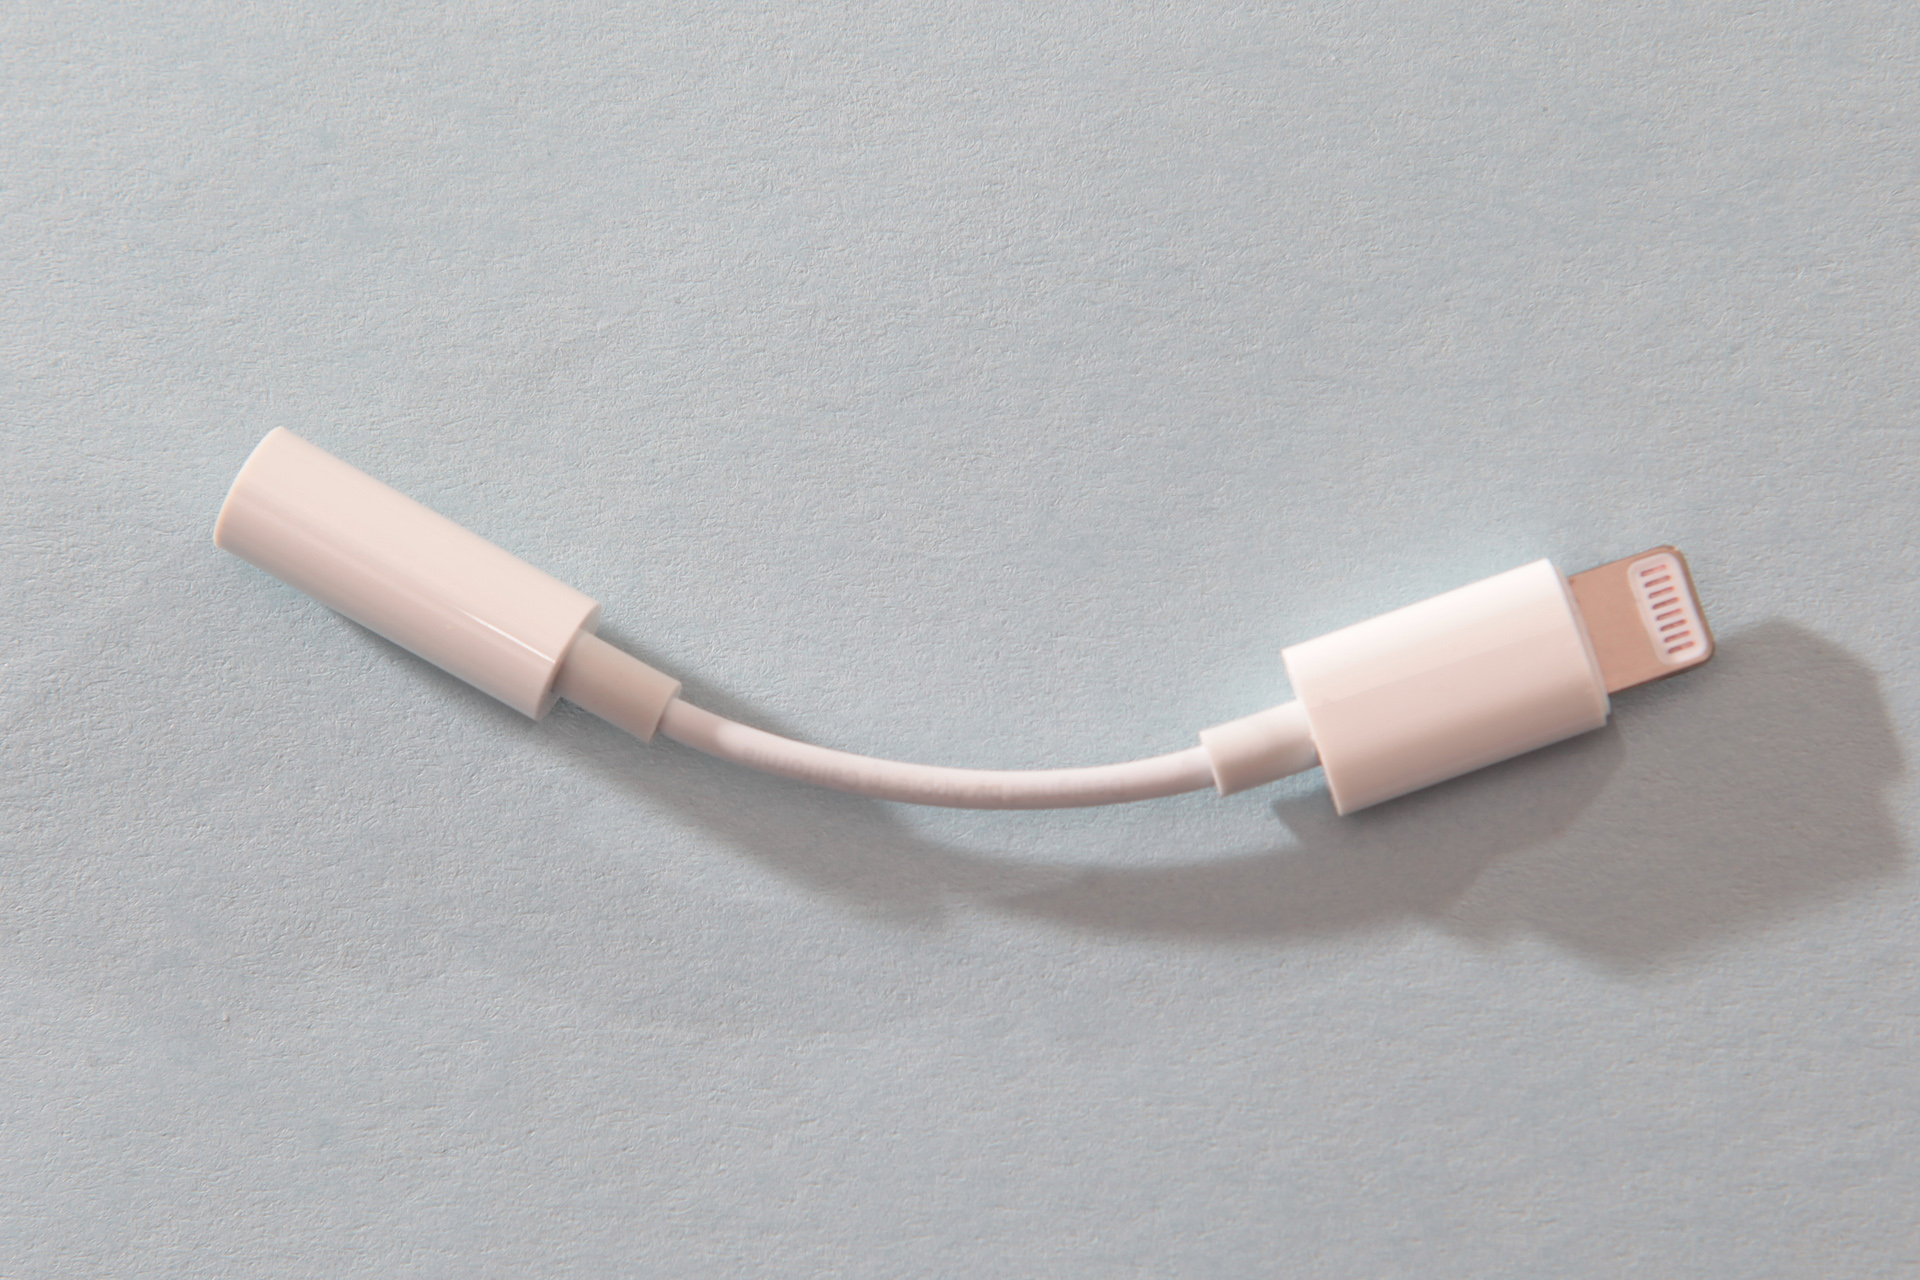
As far as I can tell, Apple never explicitly acknowledges that this device also includes a microphone input connection. But rest assured, you can use the Apple Lightning Headphone adapter to connect headphones AND your microphone. They should have called it a Lightning Headset Adapter. The 3.5mm jack is a TRRS connection with Left/Right/Ground/Microphone connections respectively.
One variation of this low-cost off-camera microphone approach is the on-ear headset-with a microphone on a boom-arm, typically used by gamers. An on-ear headset might cost a little more than an earbud headset. For some presentations, you might decide that in-ear or on-ear headsets do not look appropriate for your audience.

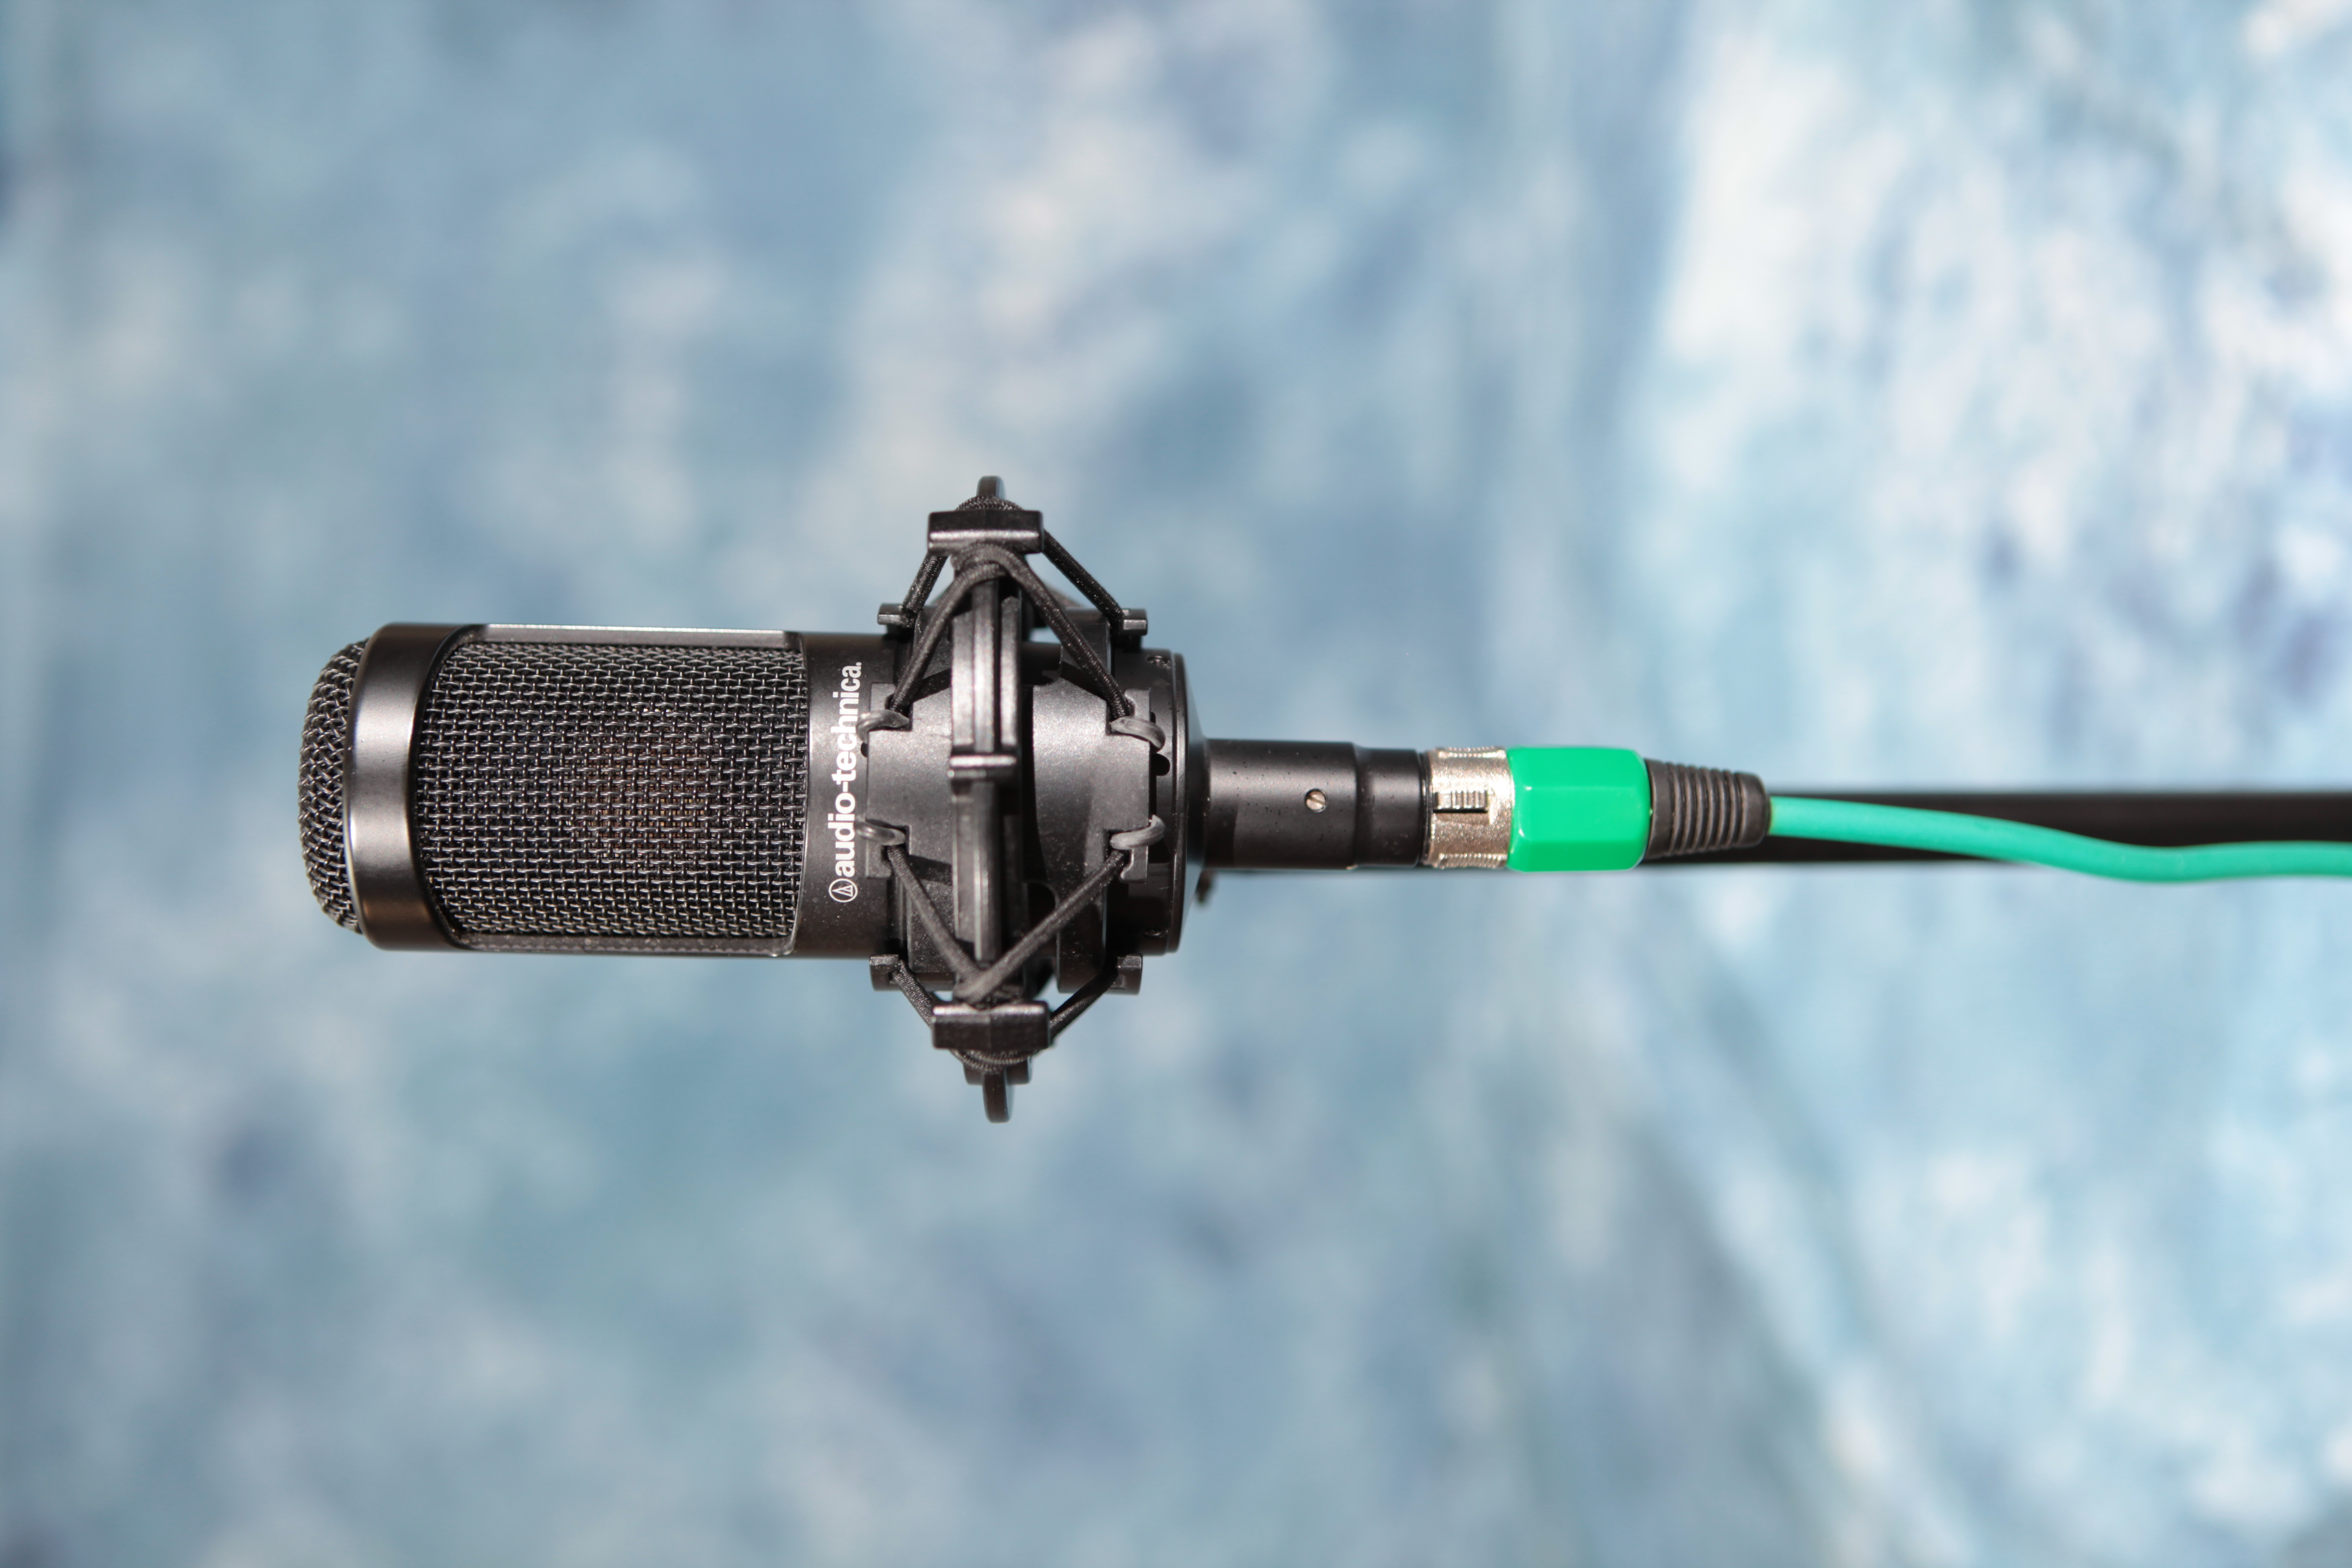
One standard practice in broadcasting is to use a lavalier or “lav” microphone clipped to the shirt or lapel of the presenter.
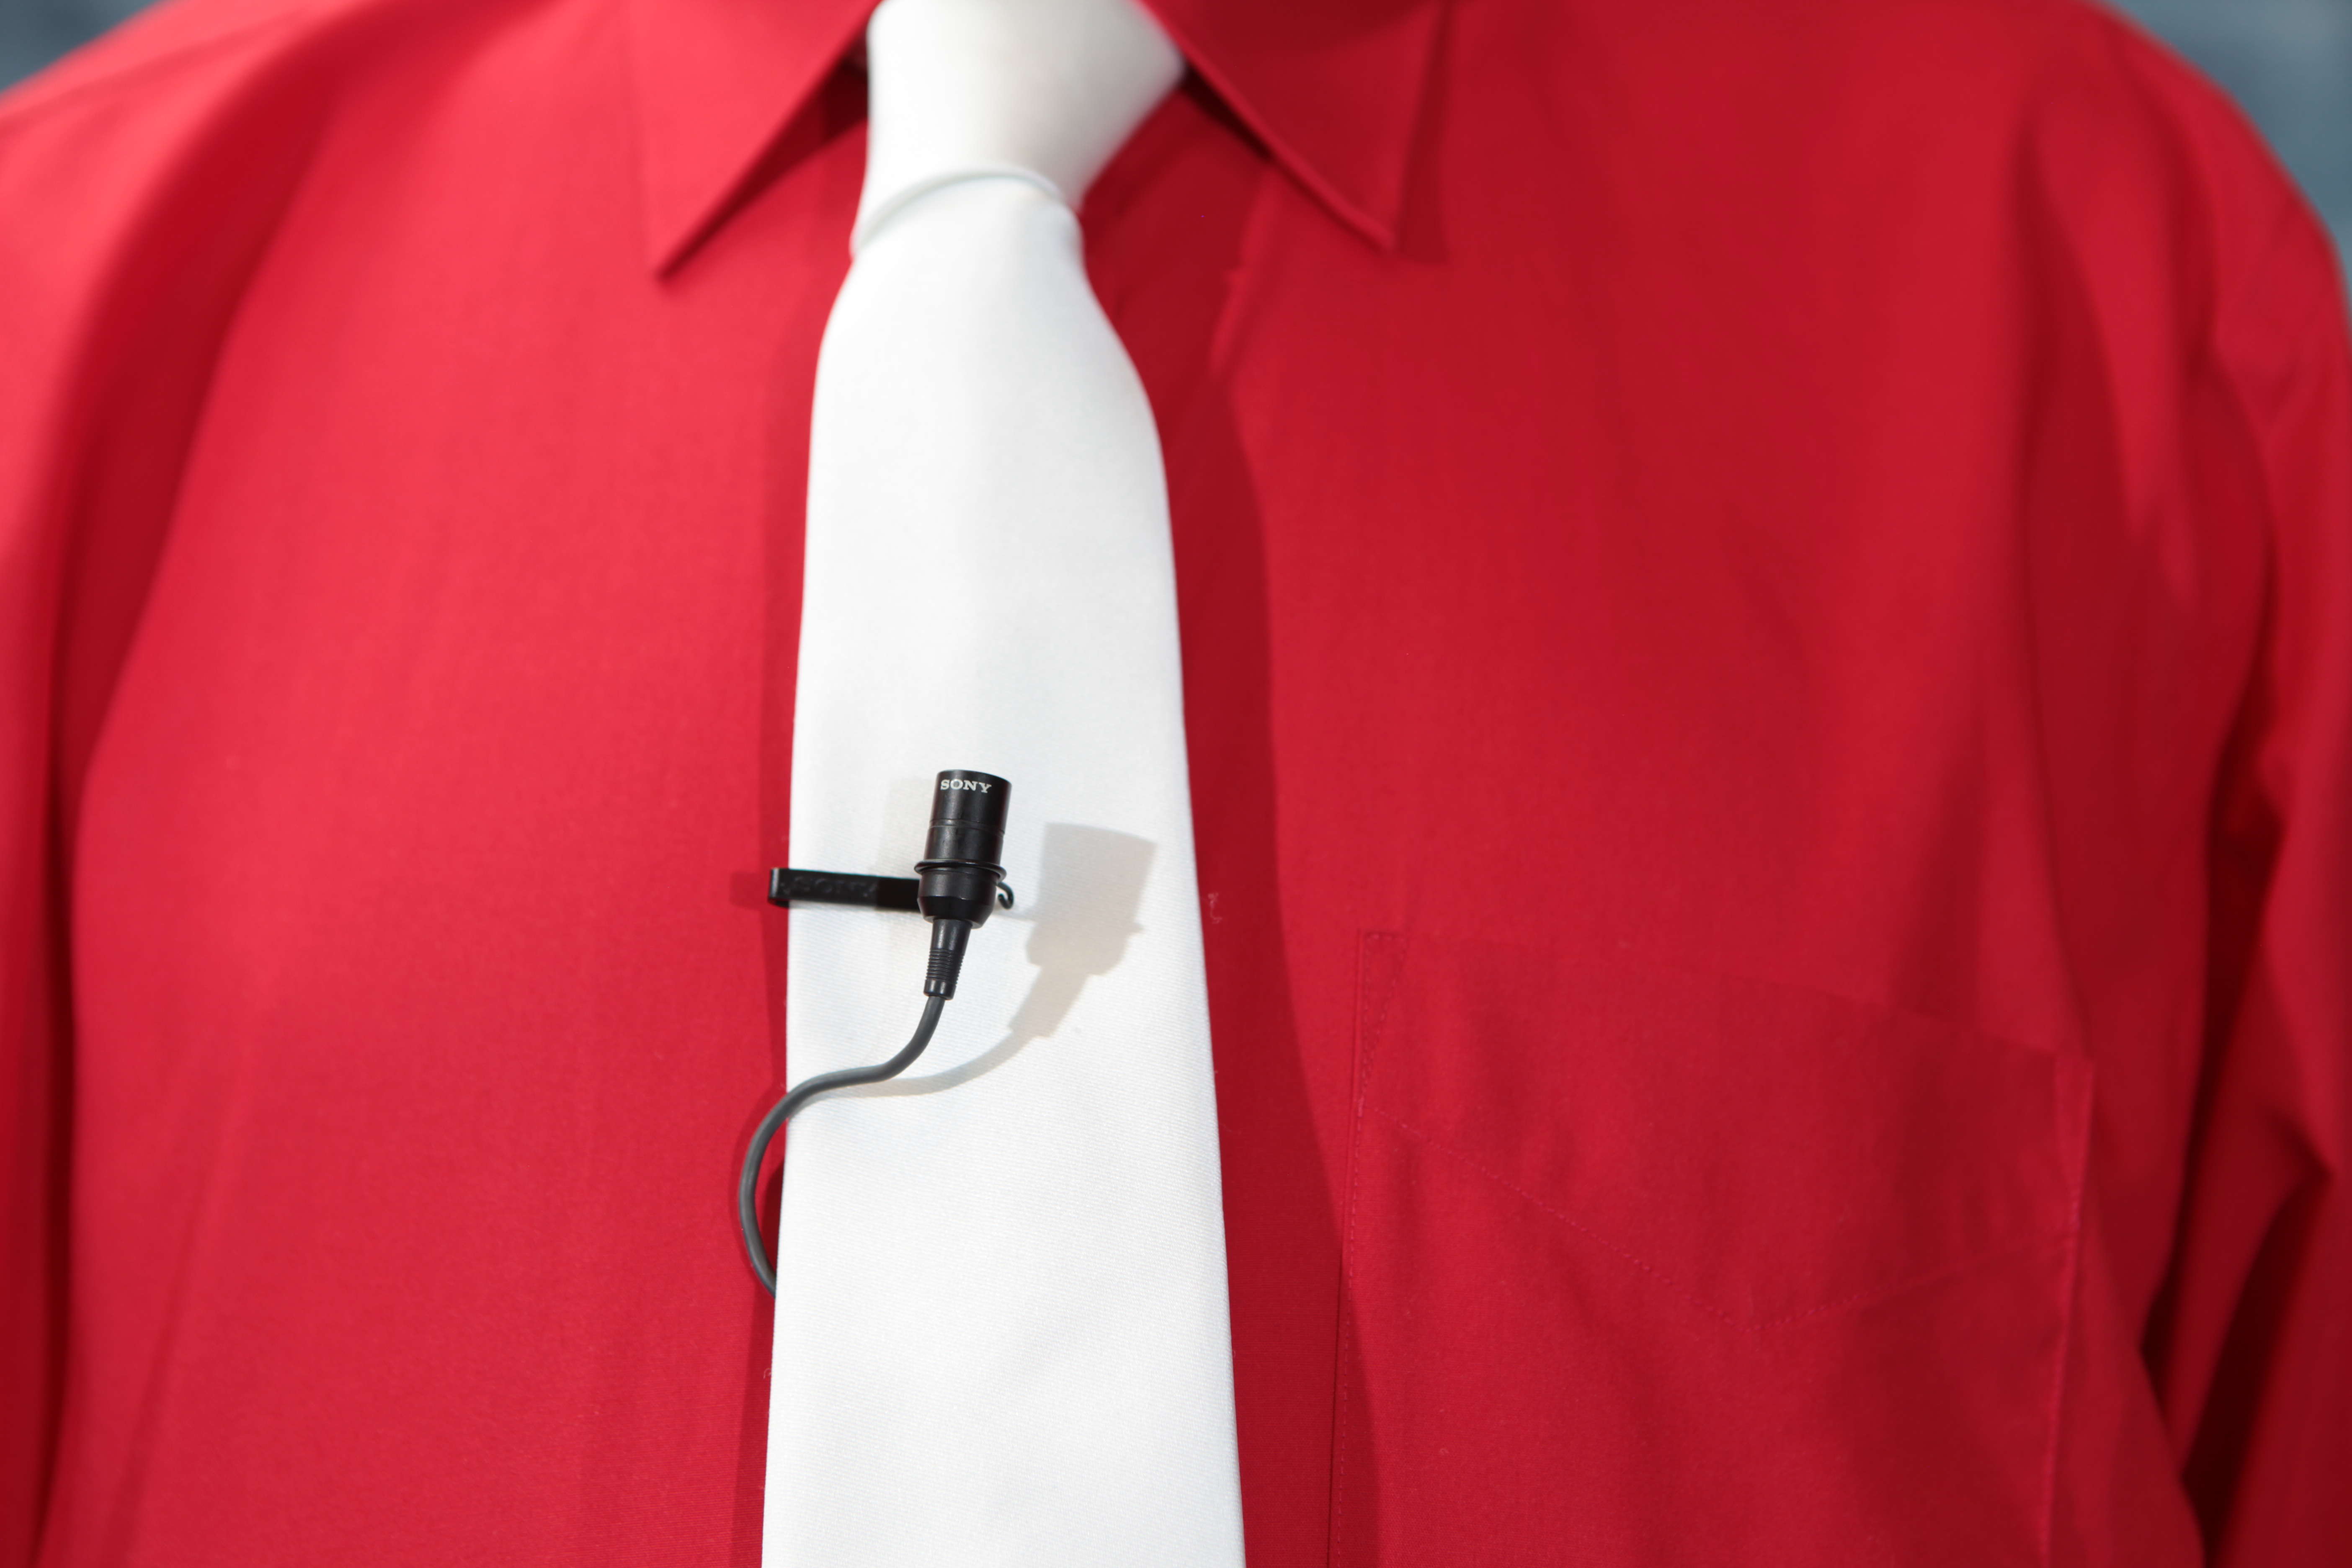
The earliest lavalier microphones were essentially a slightly smaller standard microphone with a cord (lavalier) that went around your neck and suspended the acoustic sensor at a reasonable distance below your mouth. A big advantage of this approach is that the lav microphone consistently points to your mouth, even if you are moving around in the room. High quality lavalier microphones are much smaller today. It is easy to position the lav mic to always be about 6-12 inches from your mouth by clipping it to the front of your clothing. The microphone cable can be hidden inside your clothing, but that is not required.
Unfortunately, this also means that you might be somewhat tied down by the microphone cable, unless you are using a wireless microphone arrangement.
Another thing to consider with lavalier microphones is that they are generally used pointing up towards your neck and mouth. This is great in a high-ceiling environment like a broadcast studio. But if you have a low ceiling with a hard surface like drywall, you might need to rig some kind of temporary sound absorber above your head.
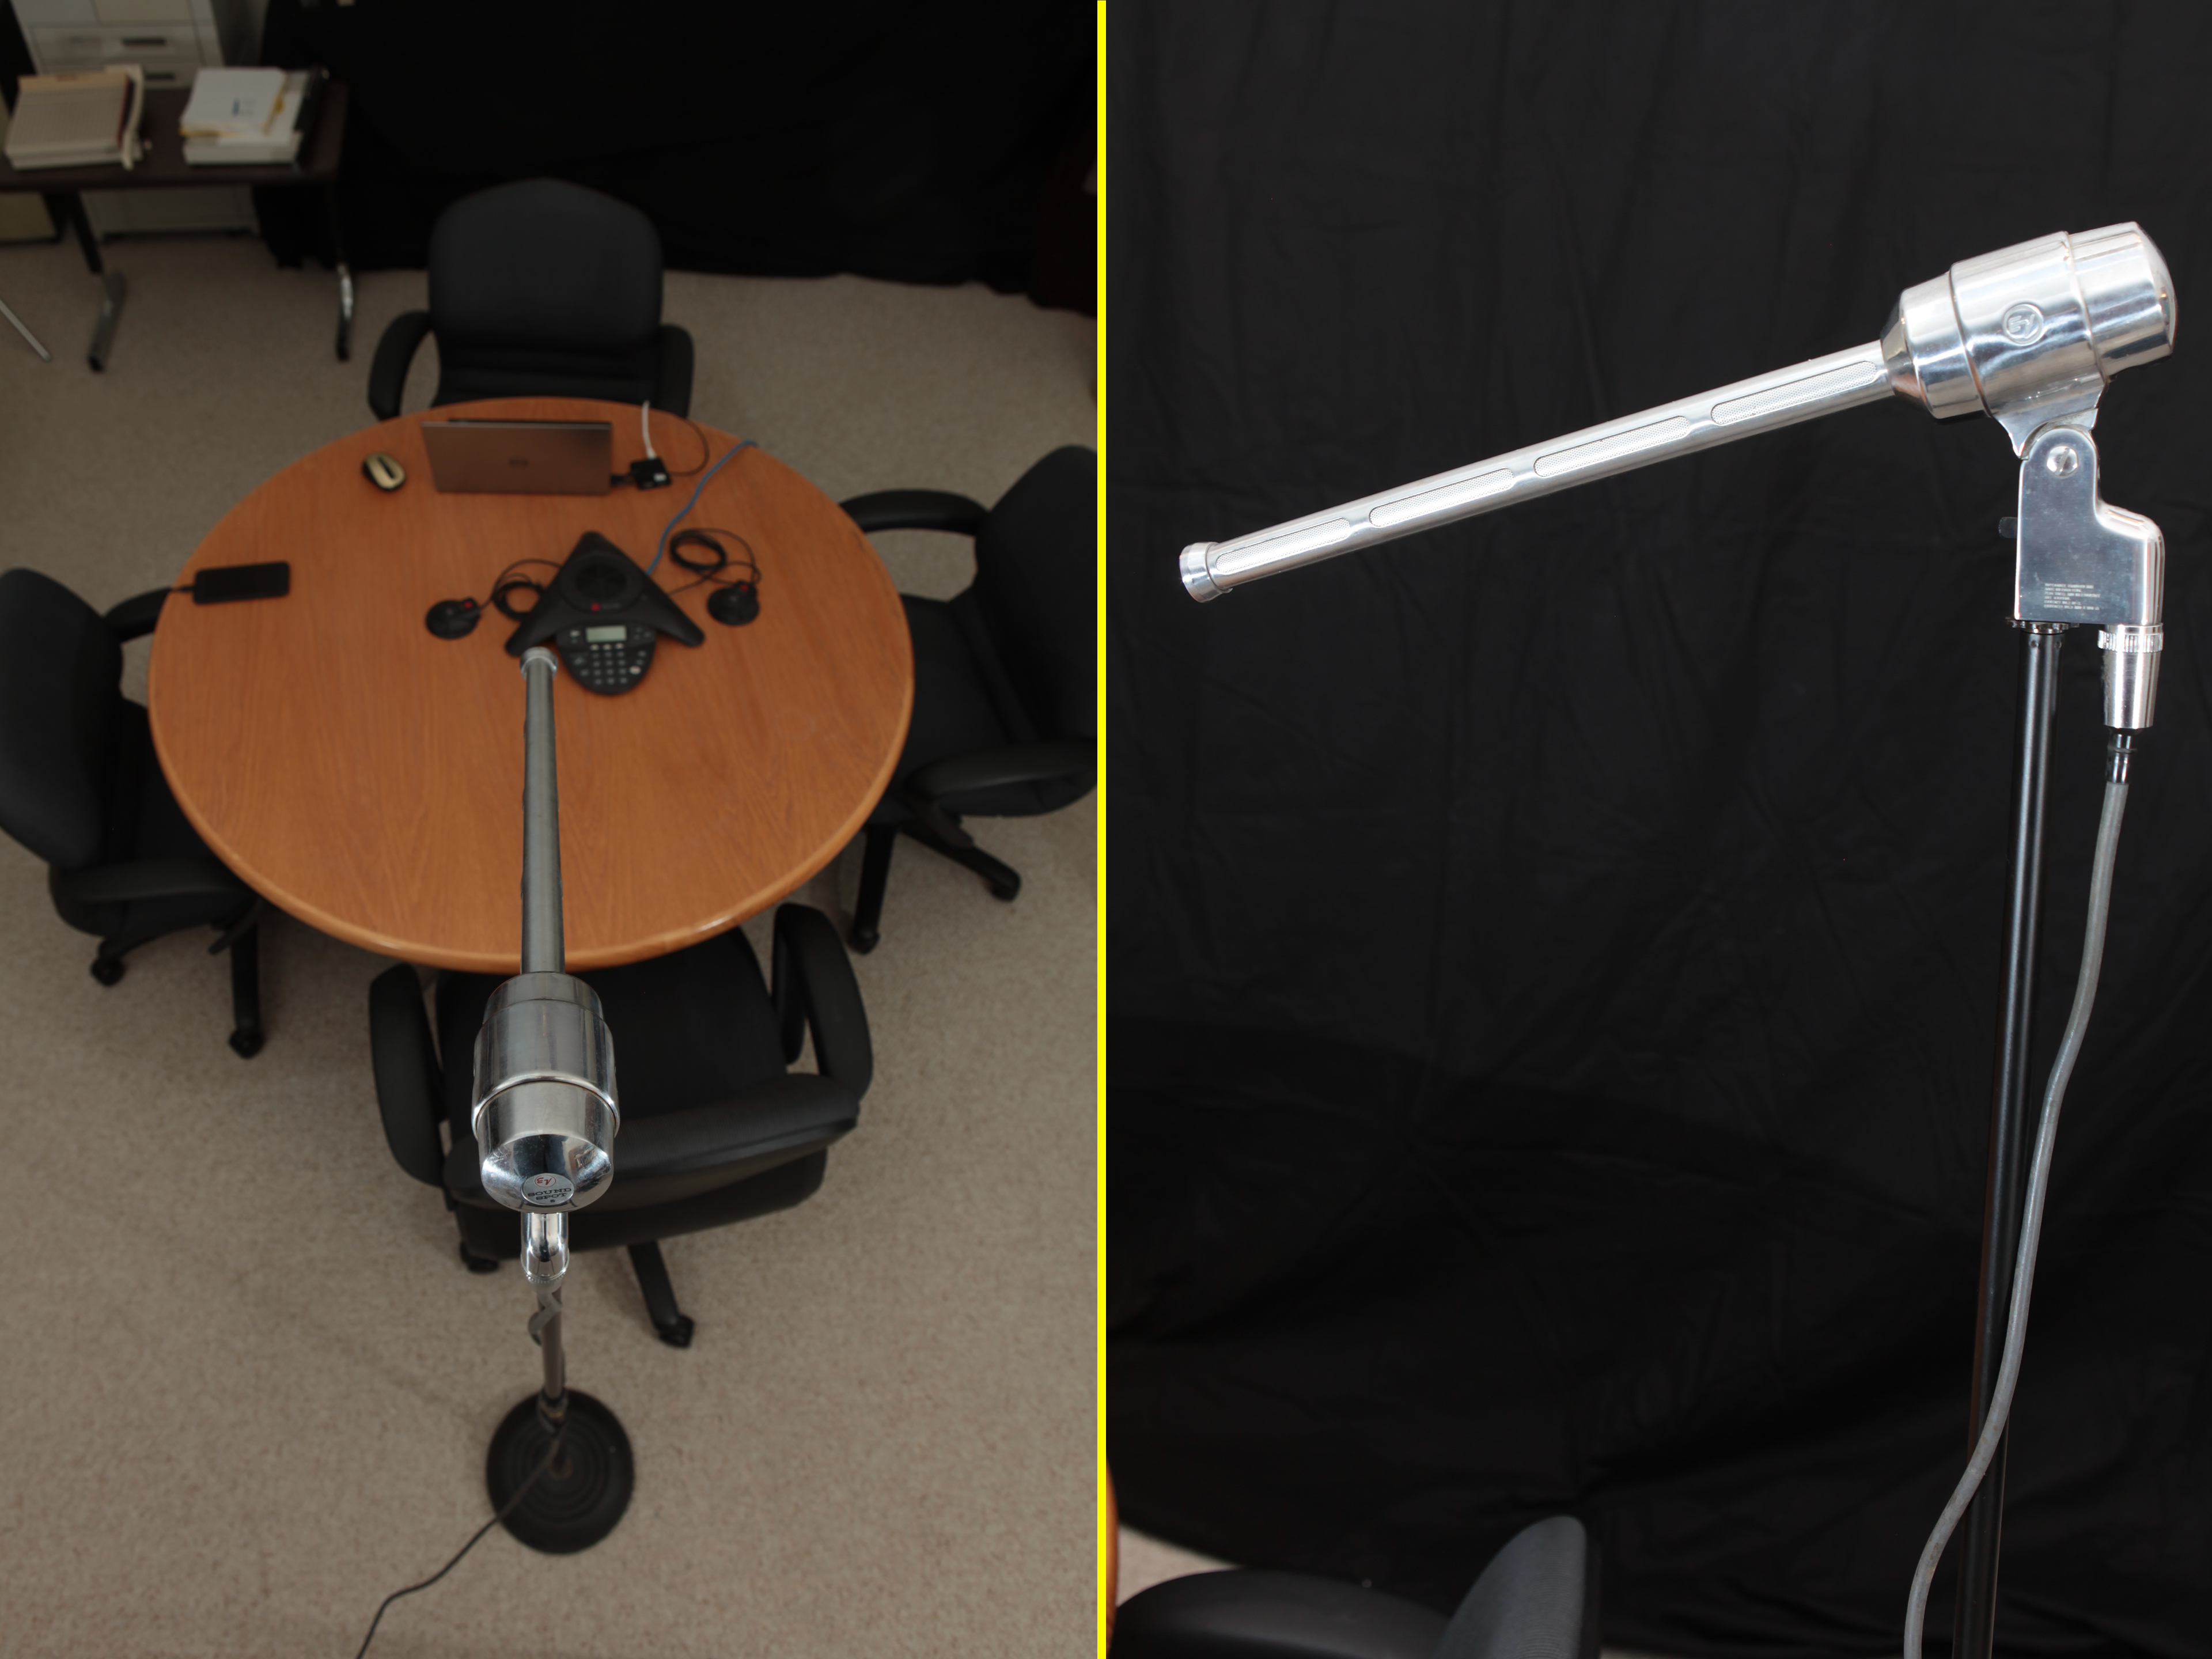
Another standard approach is to place an “interview” style microphone on a desktop stand, just below and in front of the presenter’s mouth.
A desktop microphone typically appears in the video frame. Most of us are so conditioned to seeing this that we do not find it to be a problem. However, this position does not work so well if you need to move around a lot or if visibility of the microphone is somehow distracting from your performance.
A third standard broadcast approach is to suspend a “shotgun” microphone just out of view of the camera above and in front of the person speaking. This is really challenging and often requires another person to constantly control the position of the microphone. Also, fixed overhead microphone mounts do not fit with the room décor your spouse has carefully chosen.
Professional shotgun (extreme cardioid response) microphones can increase the mouth-to-microphone distance a little. Perhaps this could be up to about 3 to 6 feet (1 to 2 meters) if the room is large and acoustically dead (not so many echoes). You must stay in a fixed location if you don’t have a second person to continuously re-point the microphone.
One other option is the handheld microphone.
Think of the basic stand-up comedian: they not only hold the microphone, they often incorporate the presence of the microphone into their act. This is not a good option if you need your hands free for your presentation; for example a handheld microphone would be in the way for a cooking demonstration.
A handheld microphone can be wired or wireless. In fact, nearly any microphone can be operated wired or wireless, but wireless systems add more cost.
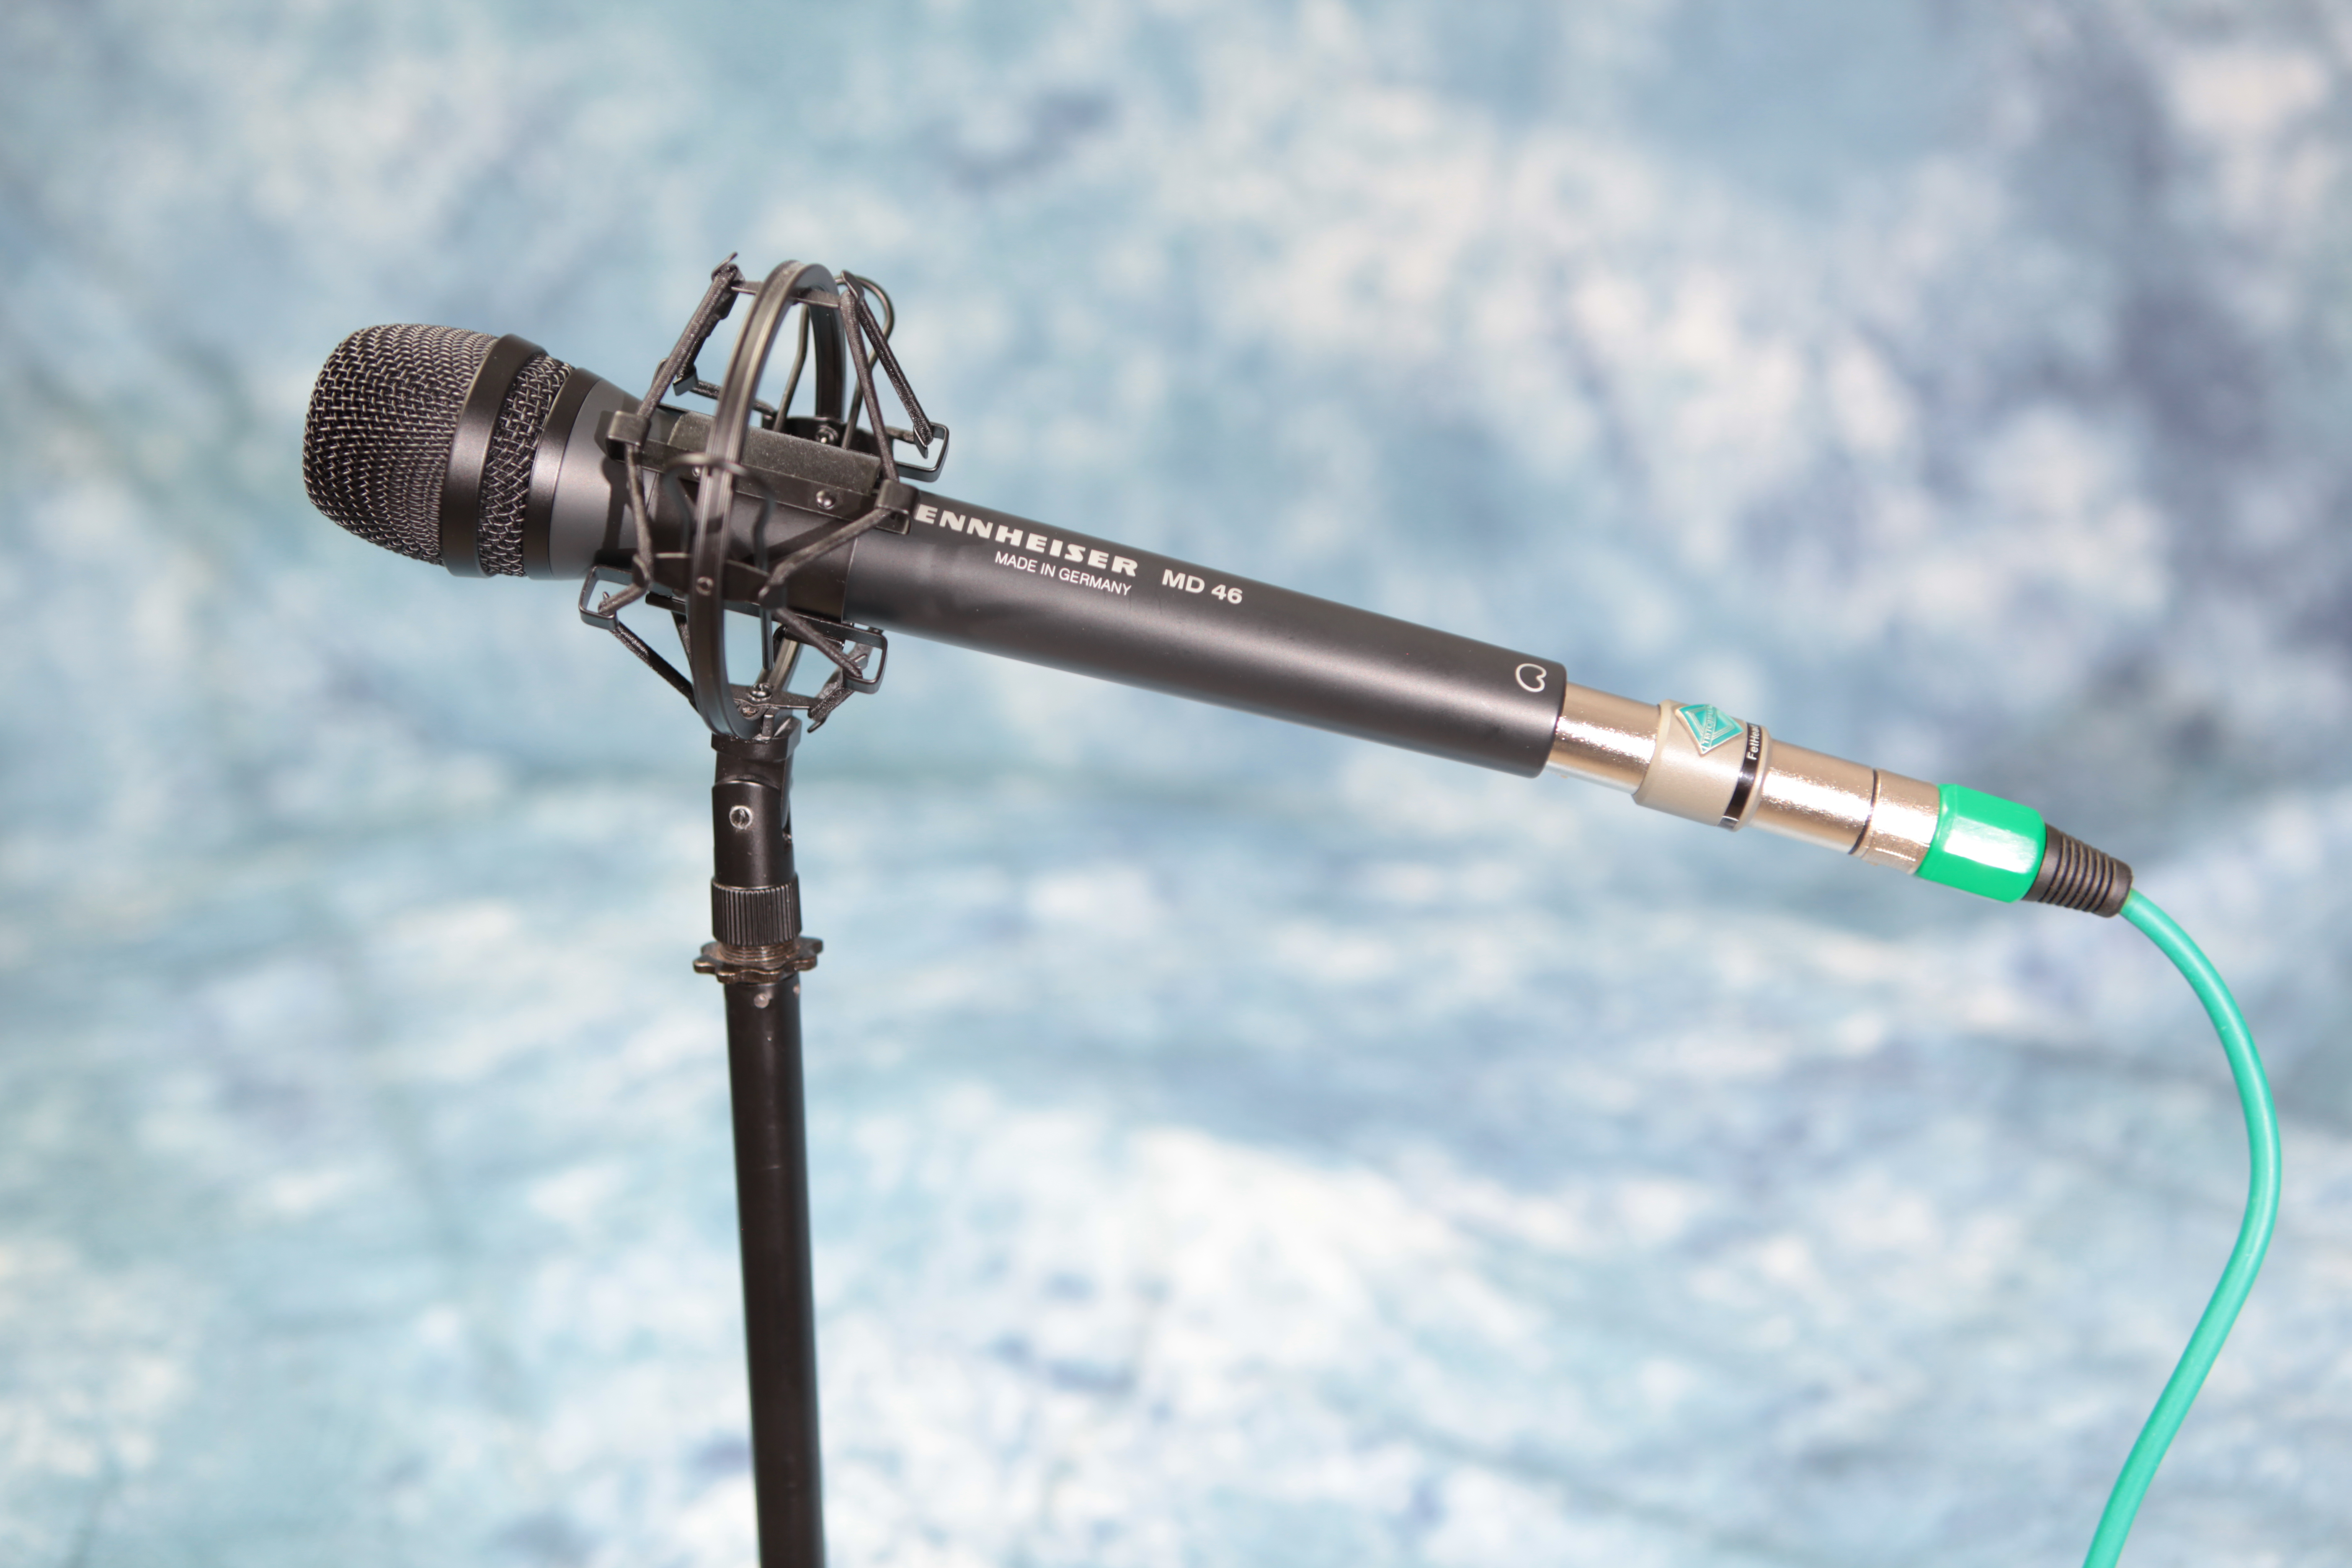
The quality of sound from a microphone is often related to the size of the transducer. The transducer is the mechanism that converts sound energy to electrical energy. This is another reason why smartphone microphones generally don’t sound as good as other options: they are simply too small.
If you are capturing content for later editing (in other words if you are not presenting in real-time) it is better to capture your audio content with a dedicated audio recorder.
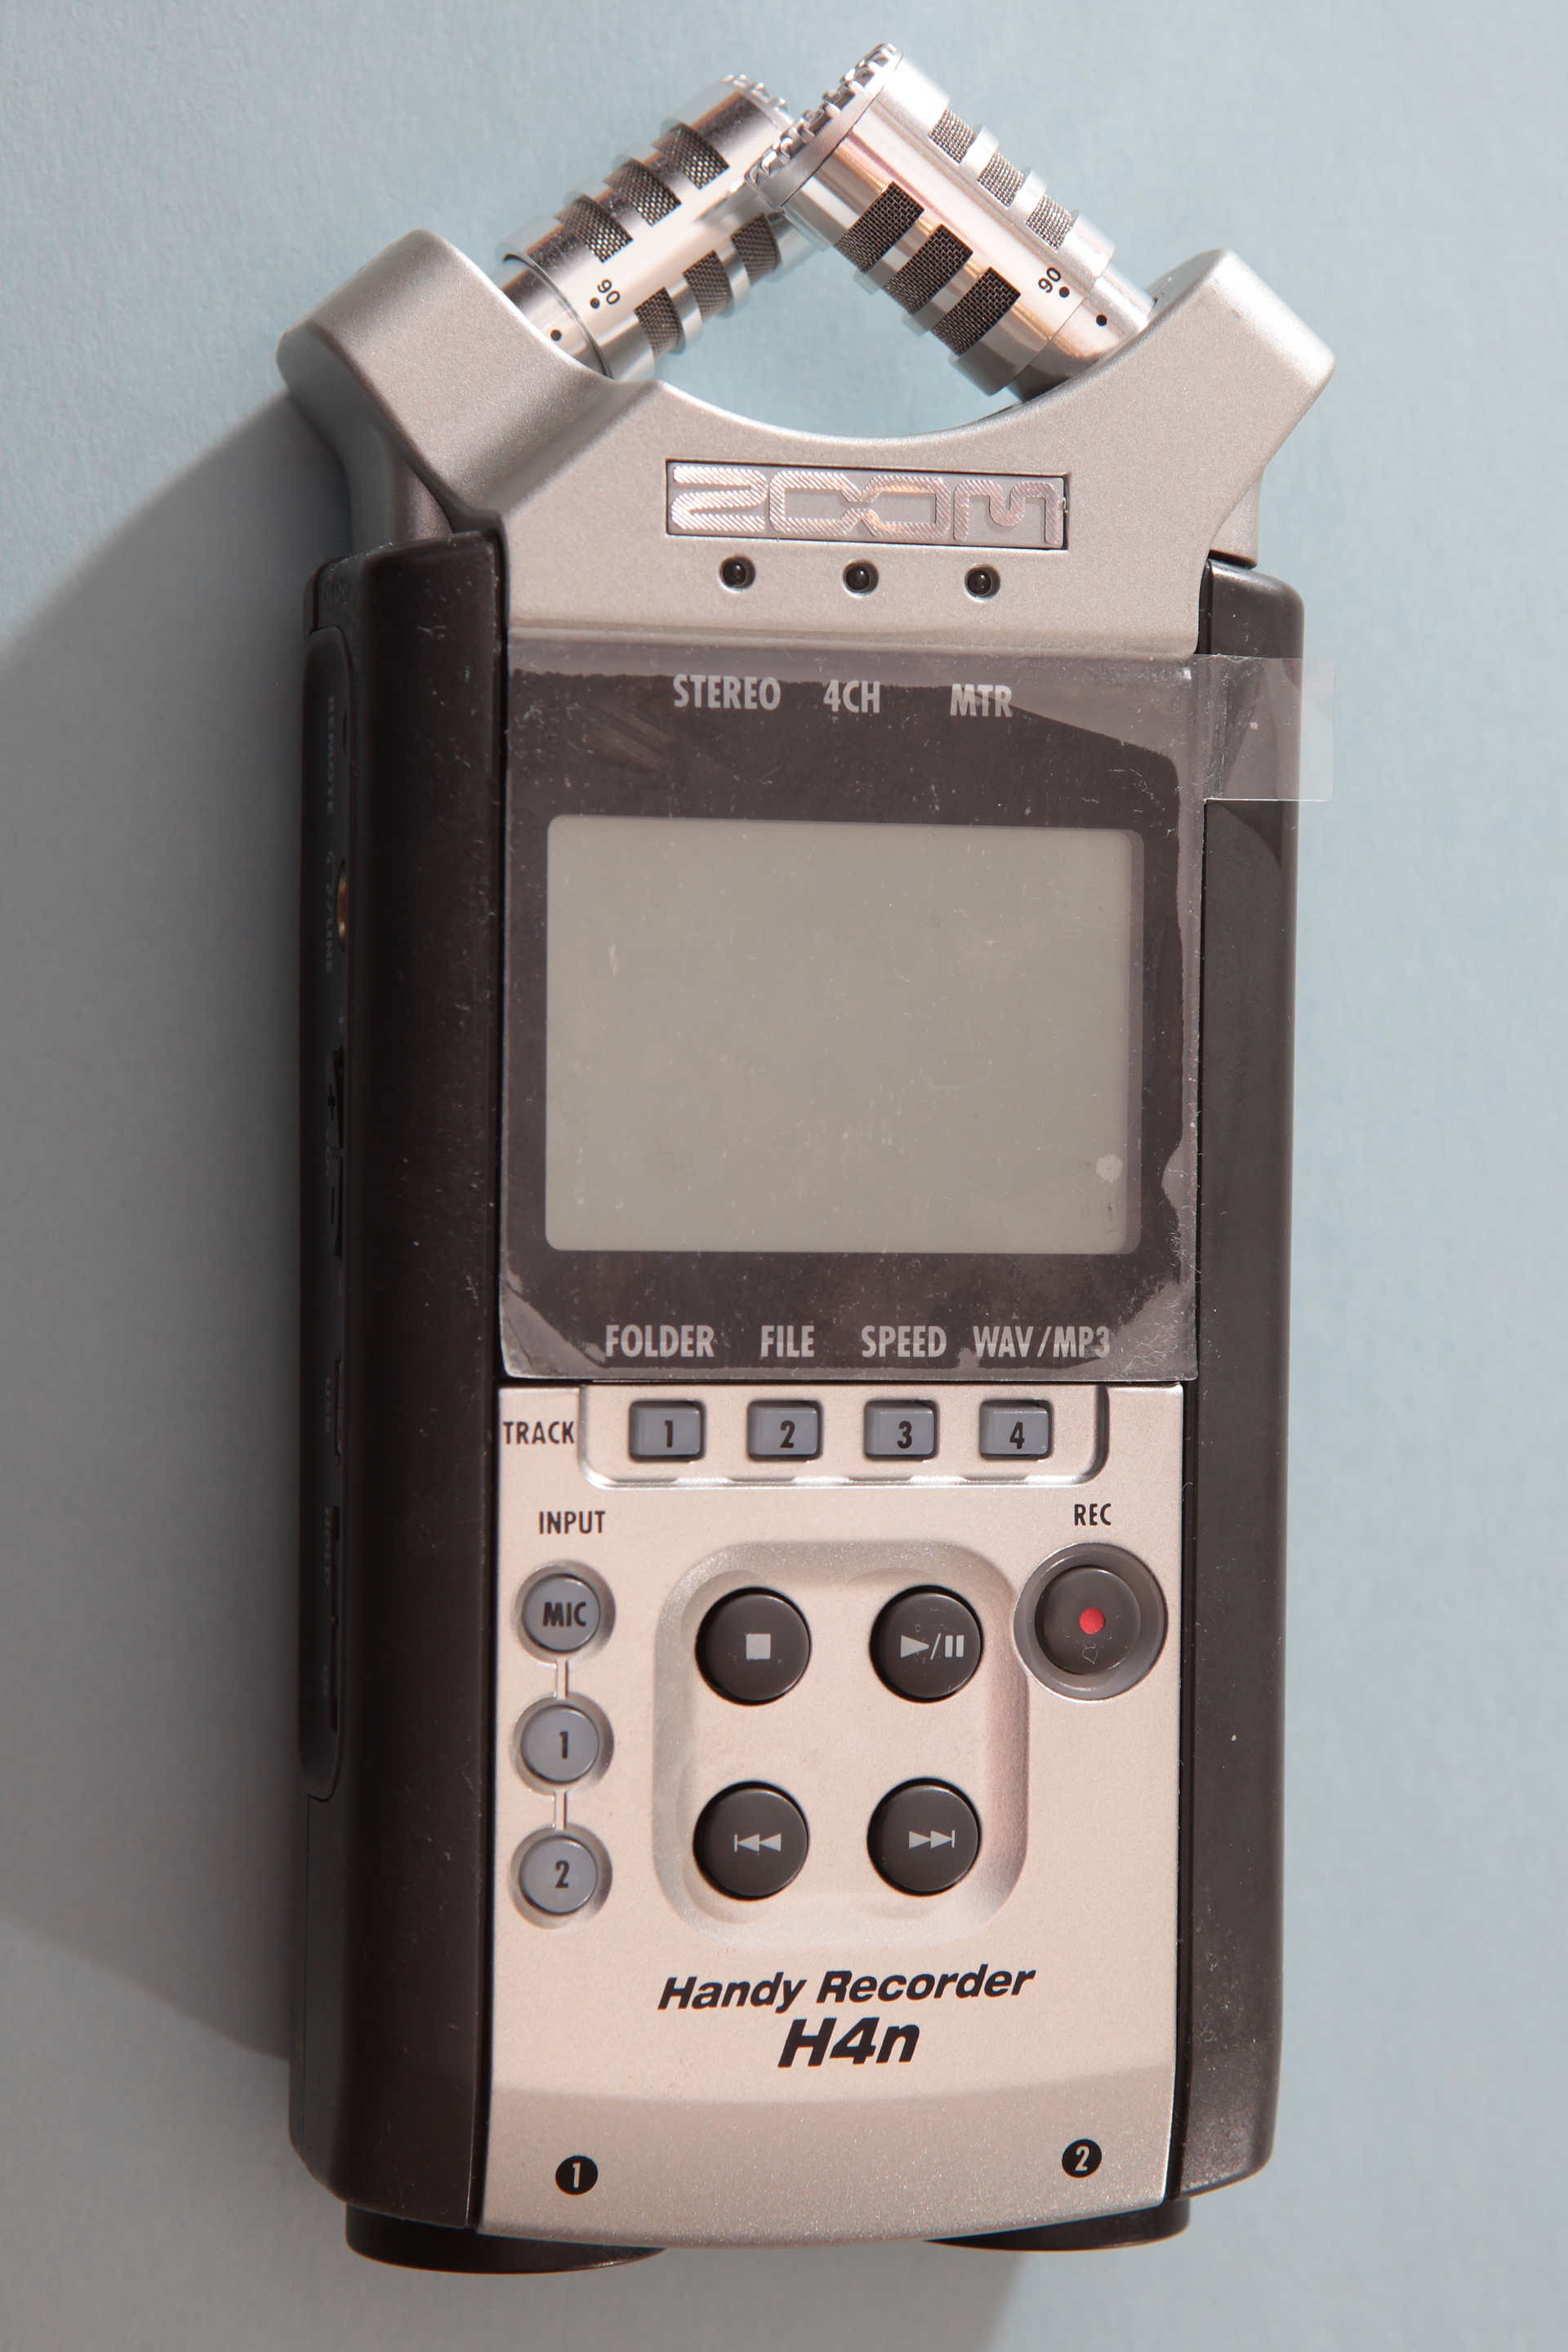
These digital audio recorders have better microphone amplifiers than most cameras or phones and can capture higher quality sound as compared to the internal audio formats used by many phones. You can feed the analog output of that recorder to your phone, video camera, or other devices for reference, but later insert and synchronize the higher quality digital audio capture for your final edited video.
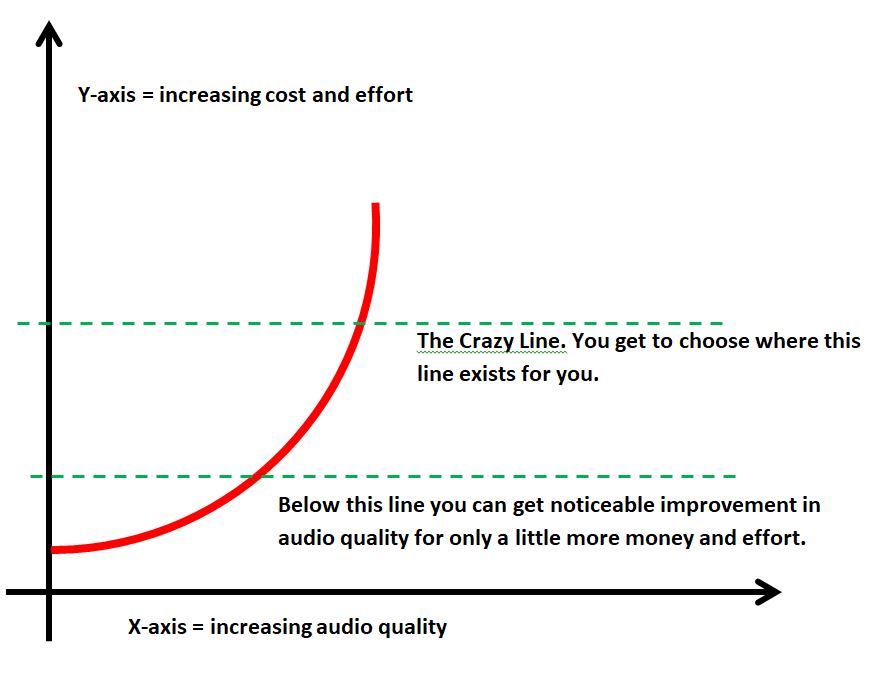
If you want to use professional microphones with consumer devices like your smartphone, you will need an interface device to convert the XLR (differential) signal to the TRRS (single-ended) signal used by a consumer audio device. It is important to note that the better you want your sound to be, the more expensive and the more work it takes to get that better sound. You want to find a good compromise of simplicity—meaning less work—and lowest cost that gets you good enough audio. In other words, you don’t want the listener to get upset when they try to listen to your production.
Rule 2: Noise is any signal you don’t want.
Try your best to remove loud sources of acoustic noise near where you are recording. You might need to turn off your furnace or air conditioner for a little while. Recording outdoors will reduce echoes, but can also lead to sudden bursts of unexpected noise such as cars, kids, birds, dogs, lawnmowers, leaf-blowers, and chain-saws.
Rule 3: For Live Content, be sure you have easy access to a microphone MUTE button and indicator.
There is nothing worse in a video conference than a person with loud background noises that constantly interrupt the speaker-of-interest. You need to have a quick way to shut off your own microphone sound. The MUTE button is typically an on-screen feature of your teleconference software. Be sure you know how to find and activate this easily. Likewise, please know where to look for an indicator to see if you are muted when you are trying to speak.
Summary:
I strongly recommend you search the web and YouTube using the terms like “better audio for video.” This effort can keep you busy for hours. Remember that some of the videos and articles you will find are intended to sell you on a specific solution. Don’t get carried away.
You should try to obtain the best audio quality for the least amount of money within your budget.
Good luck and I hope my comments here can help you find some low cost ways to improve your sound.